If you just go for a paddle than you can stop thinking about wanting to go for a paddle.

Sunday, October 23, 2011

2011: Post 48 – Three weeks is a long time

The last time I paddled was Oct 2 (see Post 44).  Since then some things had come up that kept me off the water and then I had a cold which turned into a flu that lasted 9 or 10 days.  I had missed a couple day paddles, I passed on a weekend camping trip, missed several Thursday practices, and passed on a club paddle yesterday.  But today, three weeks later, I finally got back on the water.

I met Tony and Gary at St. Philips and we decided to paddle over to Bell Island.  It was a sunny afternoon, about 12 C, and almost no wind.  There was a very gentle swell in the tickle as we paddled over and back.  We paddled over to Dominion Pier and paddled a few kilometers along the shore, past Scotia Pier, and then crossed back over for a total of 15 kilometers.

Here are a few pictures to share….

Slipway in St. Philips

Tony on the way over...

Gary on the way over...

We took a little rest on the right side of Dominion Pier

Gary hadn't paddled for a while and was happy he decided to come along

Tony picking his way through the piles at Dominion Pier

Gary bringing up the rear through the piles

This lone tree was somehow interesting to me,
but the picture just doesn't capture why.

What's left of Scotia Pier

Rusting Chain

Gary paddling past a waterfall

The water was very clear... there was at least six feet of water here!

Paddling along the cliffs of Bell Island

What a great way to spend the afternoon.  Of course we went for coffee at the restaurant in St. Philips when we got back.

Friday, October 21, 2011

2011: Post 47 – Disko floor

Continued from previous Post 46…

I had been thinking about the floor a lot in the past few weeks.  Options for the floor seems to be to dowel wood strips to the frames, lash the floor boards to the frames (like this; go to day 10 to see a pic), or to secure angles to the frames and secure the floor boards to them (like this).

I did not like the idea of doweling the floor boards as this seemed to be a more permanent option and kept thinking if the floor (or one of the boards) needed to be replaced for some reason it would seem difficult to do.

I liked the idea of lashing the floor, but I do not think there would be enough thickness left in the bottoms of the frames once a notch is cut to receive the board.

So I went with the option of using angles.  Off to Home Depot for an aluminum angle and some stainless steel machine screws…

For the floor boards I used pieces left over from the ¾ inch strips cut from the 2x4 cedar.  I glued one inch wide spacers between each board to give me a total of 6.5 inch wide floor boards.


Then I secured the angles to the frames.  The angles on the front are located so as to keep the top of the floor about level with the top of the frame…

 Masik, looking toward the cockpit

Masik, looking toward the bow

The angles in the back are kept lower so as to keep the center of gravity as low as possible…


I faced the screws toward the cockpit at both ends and positioned them so they would be below the top of the floor boards and within the spaces created by the spacers; this should prevent my drysuit from snagging on these bolts when getting in and out... 

Still have to sand off the excess glue...


I won’t bolt the floor boards to the angles but instead will use some bungee that will be secured to the angles and be snug enough to hold the floor in place.  I want the option of being able to remove the floor when cleaning out dirt in the cockpit area, or if I happen to break a board I can easily replace it.  If I find the bungee does not work then I will lash the boards to the angles and then can just cut the lashing whenever I need to remove the floor, and then relash it back in place.  But I am thinking the bungee will work as long as it is tight enough to hold it in place.

Saturday, October 15, 2011

2011: Post 46 – More good progress on my Disko Bay

Continued from previous Post 45…

This past week I got a lot more done on my Disko Bay SOF.  Over the week I got all my lashing done, made the stem pieces and epoxied them in place, and glued my coaming lip and coaming spacer together. 

The lashing I used was 50# flat artificial sinew.  I consulted the lashing video (again) that is on the Kudzu Craft website and gave it a try.  I busted the lashing on my first attempt when I tried to pull it tight.  I swore, not expecting it to break.  I cut away the lashing and got another piece.  I busted that too when I pulled it tight.  I thought to myself, this stuff is crap (okay I didn’t say ‘crap’).  I wondered if I had a bad spool of this stuff.  But I gave it another go and did not pull quite as hard and finished my very first lashing.  I believe on the video Jeff Kudza says that if you’re not busting this stuff now and then you just aren’t pulling hard enough…  I finished all my lashing over a couple days and only busted 2 or 3 more.  I think (I should say hope) I did a decent job of it though.

Lashing at the Masik

Lashing the keel.  I added a couple little groves for the
lashing so as to reduce the bumps along the keel bottom.
Don't know if it really makes a difference, but it can't hurt.

I used a couple pieces of cardboard to make templates for the stems.  Then I cut them from 11.5 mm thick Russian Birch plywood that was left over from the couple pieces that I cut the cockpit rings from.  After I cut them out I sized them up and thought I might have too much plywood in them and could cut them down a little.  But then I thought that a little extra plywood would just give it a little more strength in the bow and stern, and cutting them smaller would not take off much weight anyway.   I suppose I could put a few holes in them before skinning.  I’ll decide later.

I had some trouble with the bow.  It was late and I was a little tired and didn’t think things through enough.  I cut the excess length about 4 inches too short, and didn’t realize till it was too late.  More swearing… I got on-line after that and looked at Sean’s pics on his blog and checked some other web-sites and then realized the way to do it was to cut the excess off flush with the tip of the stem and then cut out the excess in the width parallel with the sides of the stem.   I epoxied the keel, chines and gunwales to the bow stems with marine epoxy.


I am thinking I may lash the stringers to the stems.  I know the epoxy is good stuff and should not come apart.  But I keep thinking if it does let go from the smooth face of the plywood the lashing will be there to keep things in place.  I’ll have to decide on this before skinning.

With the ‘practice’ attempt on the bow as experience to guide me, I had no trouble with the stern.


After I had the stringers epoxied in the bow and stern, I went back to work on my blunder in the bow.  I roughed up a couple filler pieces and glued them in place.  With some additional shaping, a bit of wood filler, and some sanding it all worked out to my liking.

Once I freed up all my clamps from work on the bow and stern stems I glued the coaming lip and spacer together.


This thing is starting to look like a kayak... 

View from the bow

View from the stern
(bottom cockpit ring is just laid in place)

At this point I think I could remove it from the strongback but I am going to leave it there until I get the floor figured out, epoxy the cockpit ring to the frames, and add in the fore and aft deck stringers.

Saturday, October 8, 2011

2011: Post 45 – Progress on the Disko

Continued from previous Post 43…

When I started my SOF Disko Bay kayak project I was only doing a little bit each weekend.  But progress has been slow.  After last weekend I decided I would do a little each night this past week to try to move things along and I have made some good progress.

I decided to use the same method that Sean used for his Disko (I think he got it from Dave Gentry) for the upsweep of the bow and stern gunwales.  You simply rip the 1.5 inch wide cedar into three strips with a handsaw and then glue them in the desired curvature.  This was easier than I thought and works very well.  I cut all the ends back about six feet and set up a little jig with a few nails on my strongback, glued (I used Gorilla Glue) and clamped. 

The curve of the bow

The curve in the stern

This process took a few nights as I could only glue one end of each gunwale at a time.  I am not sure if I will have too little or too much curve but now it will be whatever it will be… Hope it works out well, though.

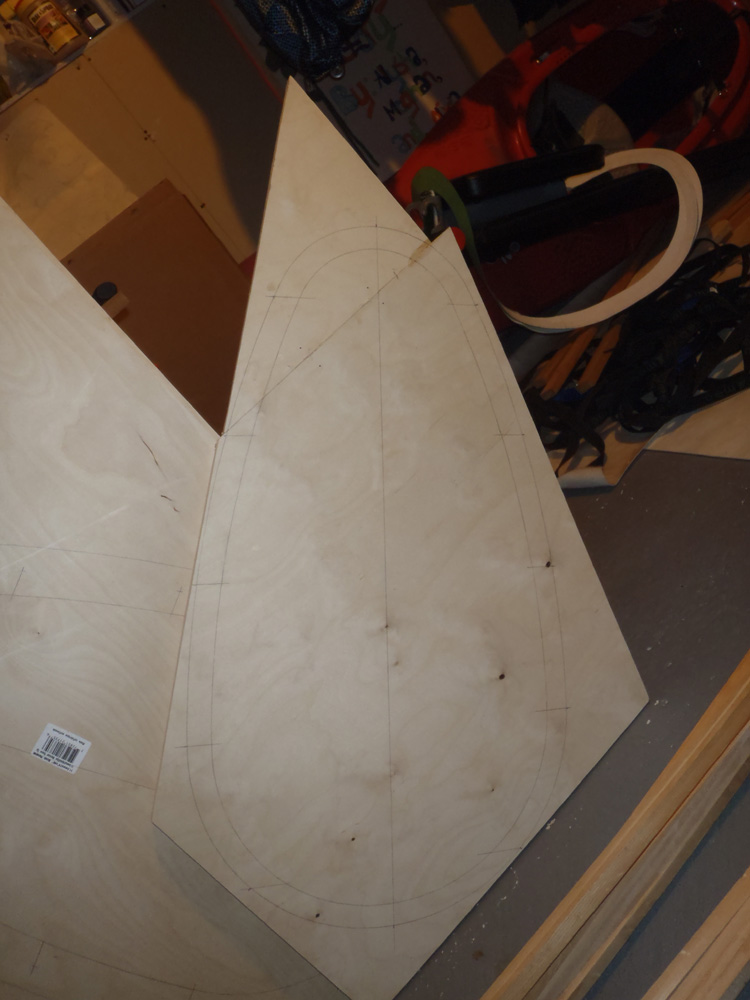
The cockpit coaming will be made up of three layers of built-up plywood, a bottom ring, a spacer, and then the coaming lip.  In the same manner as the templates I made for the frames, I made up templates for the cockpit coaming, one for the coaming lip (2 inches wide) and one for the spacer and the bottom ring (each one inch wide). 

On one piece of 11.5 mm Russian Birch plywood I traced out the bottom ring (this piece will be attached to frames three and four before the skin goes on)... 


On another piece of 11.5 mm Russian Birch plywood I traced out the coaming lip...


For the spacer I was able to use the 17.5 mm piece of plywood I had left over from which I cut my frames.  I sized things up and I found that if I cut off one corner and glued the factory straight edges then it would be just big enough for the spacer ring.  With the bottom ring and the coaming lip being full pieces I did not mind having joins in the spacer. 

Factory straight edges glued and clamped

Spacer traced out

I set to work with my jig saw and cut out the three rings. 
Perimeter cut out...
The interior is now removed
I was worried that the glued piece on the spacer might come apart with the vibration of the jigsaw but it held during cutting.  Funny thing though… as I was hand sanding the rough edges one of the joins came apart.  Perhaps there was just not enough glue or maybe I should have let it sit for the full 24 hours (I think I left it for about 18 hours when I cut it out).  But if you look at the two joins you will see one is a diagonal joint (like a scarf joint) and the one that came apart is almost straight across the width of the ring…  Anyway I decided to re-glue the join first before I glue the spacer to the coaming...


Oh yeah... I received my polyester fabric, artificial sinew, and the backband that I ordered a while back... it only took about 12 days to come from Kudzu Crafts in Alabama... 

Sunday, October 2, 2011

2011: Post 44 – The One Hundred

Today Tony and I paddled from St. Philips to Portugal Cove.  The original plan was to paddle in Bay Bulls but it was kind of a miserable weather morning (drizzling, foggy, damp, chilly) so, still wanting to get on the water, we opted to paddle closer to home. 

Today’s short paddle marked the 100th time Tony has been in a kayak this calendar year. 

I know Tony is retired and us working stiffs tend to think that he has all the time in the world and so all the paddling he does is easy for him.  But the truth is that he is probably just as busy in retirement as when he was working, and sometimes more busy...  My father retired about 8 years ago and he has said to me several times that, looking back, he just doesn’t know when he ever found the time to work…

Anyway, here are a few pics from our short paddle today…

Leaving St. Philips

There was little wind but the swell and waves were coming in from the open ocean from the North so there was lots of places to play as we paddled up to Portugal Cove...


We pulled up on a little beach near the ferry terminal for a break and just as we got back on the water the Flanders was pulling in...

Tony near the  ferry terminal

The Flanders

More places to have a little bit of fun on the way back to St. Philips.... 


Heading into the channel at St. Philips...


There is something fascinating about watching waves crash upon the shore.  It’s even more fascinating to watch them from a kayak…. I took a bunch of pictures on the way trying to get a good one...


Oh yeah, and it finally happened.  I knew it would one day... About halfway back to St. Philips Tony got pulled over by the RCMP!  And here is the proof…

Sir, may we see your license and registration please?

Actually, one of the fellows on board is a kayaker that we have, on occasion, paddled with.  I think he recognized us and got the boys to come over to say ‘hello’….

After we rinsed off in the river and got geared down we went for a late lunch of fish and chips at the nearby By-the-Beach restaurant.  It was a great way to end a fellows 100th time in a kayak for this year... and just think - he still has almost three months left of the year.  The addiction runs deep, me thinks...

2011: Post 43 – The Disko Strongback


Continued from previous post number 42..........
No folks, the Disko Strongback is not a dance from the seventies; I was much too young in the seventies to know about the whole disco thing... Anyway...

Yesterday (Saturday) Sean, Dave, Gary, and myself paddled from St. Philips to about a kilometer past Topsail Beach.  We did not have the wind that was forecasted but there was enough to make paddling against the shore a bit of fun.  I forgot my camera so I don’t have any pictures to share.  But it was a nice paddle into a bit of wind going and a nice following sea coming back.

After I came home I put my gear away, showered, and headed to Home Depot to find something suitable for a strongback.  Dave Gentry’s plans suggest a straight 2x4 is adequate…but I opted for a piece of SPF 2x6 x 12 feet long that looked decently straight to my eye.  I figured there is less chance a 2x6 will warp compared to a 2x4.

After supper I set to work.  I marked the locations of all the frames on the 2x6 and struck a chalkline down the length.  I marked out  and cut out the support for the kayak’s first and last frames and secured them to the 2x6 in their proper locations.  Here are some pictures of the strongback with the frames attached.

...looking from the bow end

Frame 1

other side of Frame 1
That's just a little bit more accomplished...  it's slow progress I know but I am in no particular hurry and I have limited knowledge of what I am actually doing so I have to take my time and think things through to try to do things at least reasonably right...